Bloody Train Step by Step
I have two paintings in this show, stop by if you can.

1. Lay in
Here is a recent train painting that I did sort of a work in progress series of photos. I started with a under painting of thinned transparent orange and then sketched in the drawing with a neutral mix after it wash had dried. I should have taken a photo at that stage, but had not gotten the idea of a WIP yet. I then applied very thin paint with a rag for my lay -in. I almost stopped there as I kind of liked it as a "modern" art piece. I decided to go on and took a picture to preserve it in cases I messed it up, that got the WIP idea rolling. The dull orange at the top of the painting is the under painting.
2. Getting the brush out
Sorry about these inconsistent photos, but I'm not set up for good ones. Here is where I took out my brushes and stated adding a little bit thicker paint. Mostly dark edges and refining the drawing , but some added color and details to the cars. Generally I'm thinking Green and it's complement Red as my dominating colors.
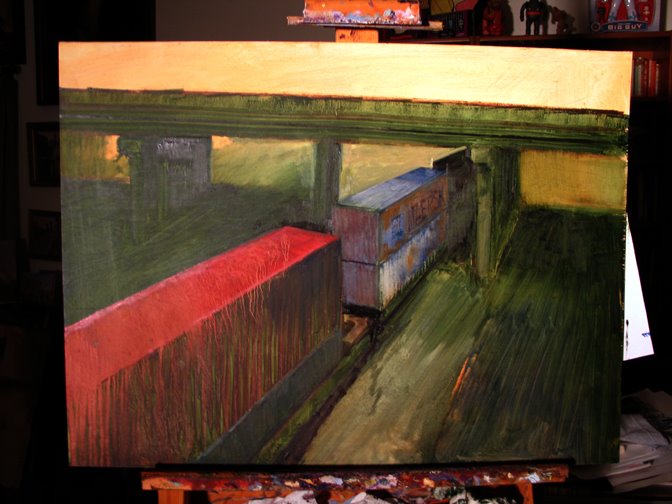
3.Getting it wrong.
Added in the city background and had my bloody train theme going and got a little carried away with the red paint everywhere. I put the tracks for the first time. I now realized the background wasn't working... covering the horizon line with the bridge presented a visual problem that the city felt disjoined to the rest of the painting.
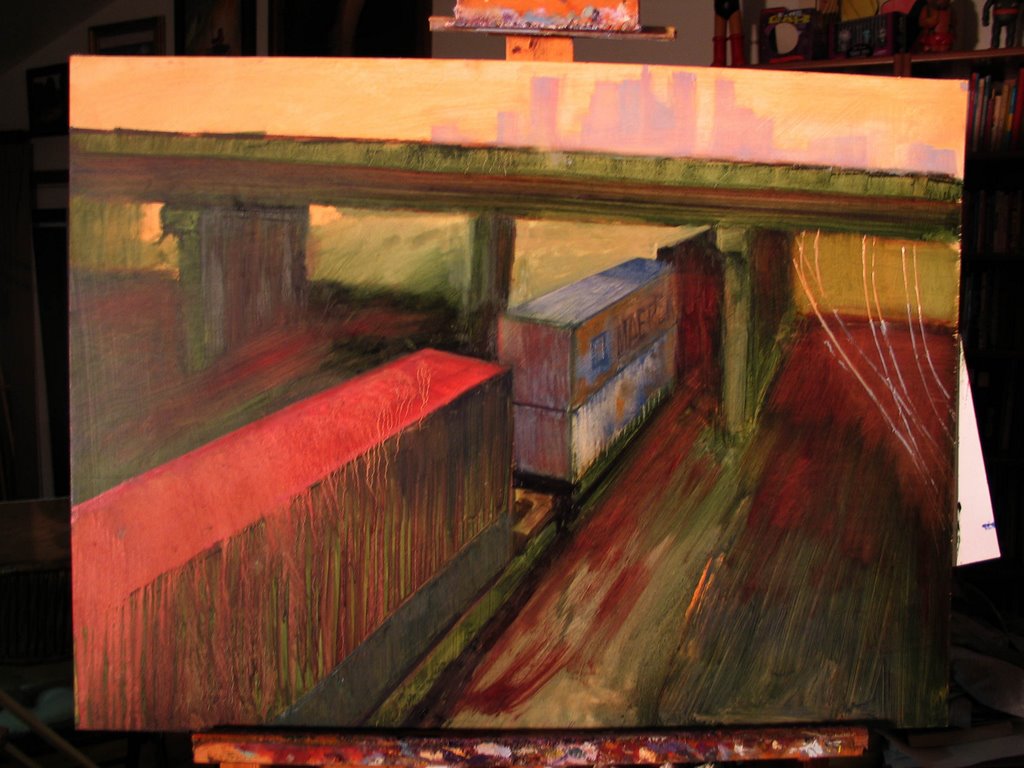
4. Re- thinking and changes
I hadn't figured out the problem yet and stated re- working the foreground a bit more getting the red focused back on the train by darkening the overdone red shadows on the ground. Still felt sick and in trouble. ;-)
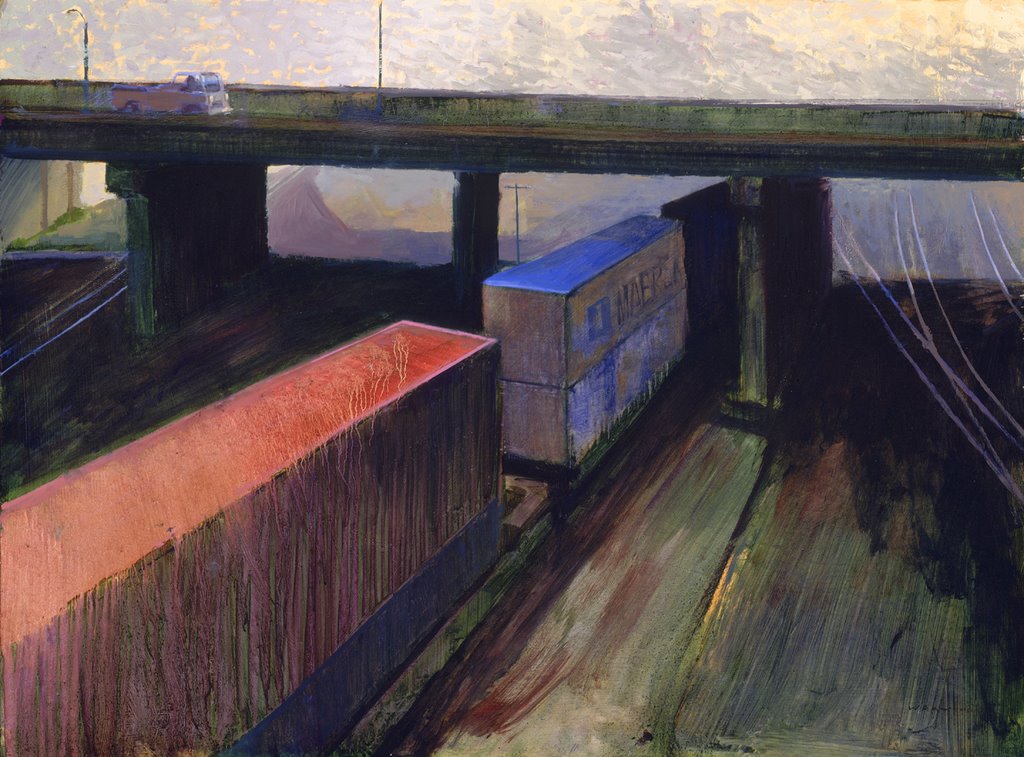
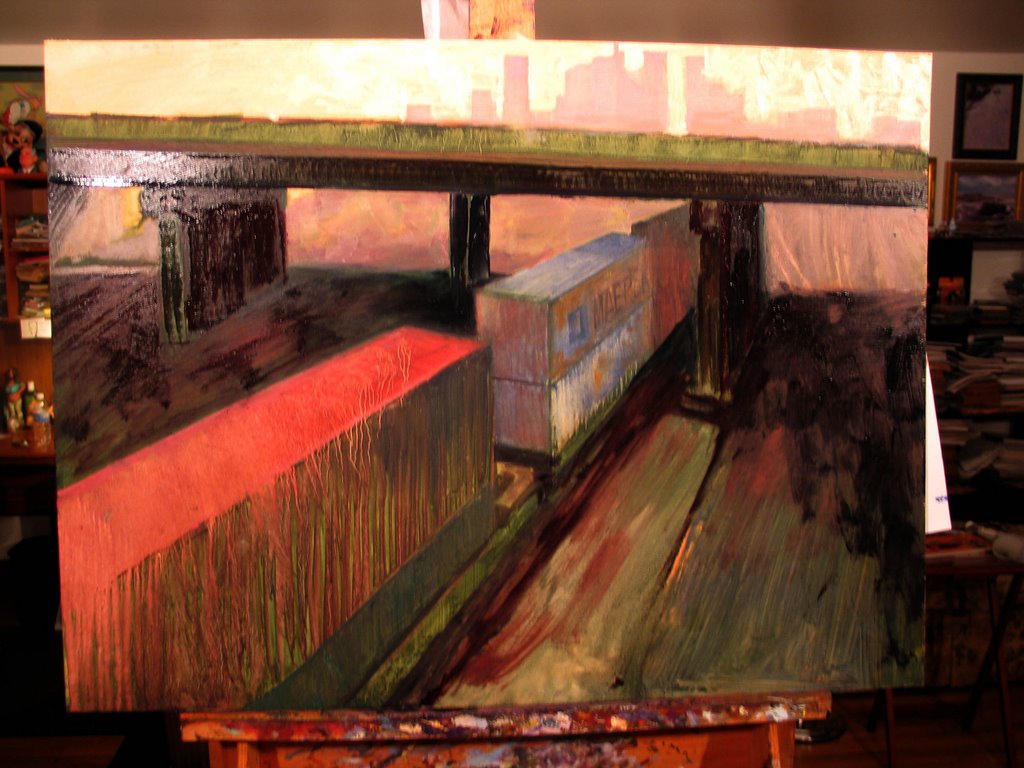
5. Final Painting
I tried painting in more details under the bridge to make my transition worked by sheer detailed painting, but it still didn't work. I should have taken a photo at that point, but was to frustrated and determined to pull the thing together to stop. I remembered the old adage: less is more and took out the sky line and ended up finding that acceptable. I added in the little truck and a bit more detailing and this is the result. final is 24x39 Oil on wood.
posted by william wray at 12:50 AM
![]()
![]()

12 Comments:
Really enjoyed looking at your painting process ! I think it turned out fantastic.You really did a great job weeding out the problems, the focus now is on the trains.Hope you post more of these stages paintings !Thanks !
Process is good.
I should follow that less is more thing sometime.
My current method of painting is wanting to work everything to death, to a point of over-working it. Trying to find the boundry somewhere and go beyond it.
I'd be really curious to see your method on one of your character paintings.
Hey Sheri,
It shows that when you pick a complex shot you need to do more planing in the drawing stage. I was to cocky. The drawing could still be a little better.
This comment has been removed by a blog administrator.
Hey Chris,
I think the initial drawing was ok, but in the subsequent" slop over" darkening of the areas around the right pillar, I didn't restate the pillar as I should have. I think the added darkness on it is distorting the perspective. I don't see the visual distortion as much in the original, but in the scan it goes even darker, exasperating the problem. I'll revisit it. Thanks for pointing it out.
I'm trying to use less and less paint , stroke , everything down to the point where I use the absolute minimum amount to achieve the maximum effect.
As far as a Character Sept by step... I did one In issue # 6 of Draw Magazine... Still in print from Tomorrows Publishing and my old pal Mike Manley.
I was originally all for the skyline, but the perspective of the train coming from under the bridge didn't really look right--it kind of looked like it would have been coming under the bridge from the air.
Taking it out seemed to work more in your favor. The "bloody train", however, looks great.
Thanks for the WIP photos, they are great. I keep combining the simplified foreground of photo #1 and the finished painting photo. The tracks on both edges are correctly drawn, but my eye seems to want the simplified "end" of the painting at the bridge.
I like the painting as it is my favorite subject matter.
thanks for showing us this WIP wart's and all, Bill. Wish i could visit that show and see your two paintings .... good luck, hope you win a prize and/or sell ... preferably both!
Hey BG , this is one of those things that works in the photo, but may need more work to work in a painting.
Hey Robert, My freiend Mark told me I was "done" on the first one / Maybe i sould stop at the first 20 minutes everytime.
Thanks Lesley, I hope your right.
Post a Comment
<< Home